|
���𥵡��С�(Mac mini)�˥�С���Proxy������褦�Ȥ��ƺä�����
¿ʬ�Ǥ����Ȥϻפ��ΤǤ����ɡ���
�����μ����Web�����С���Mac mini G4, Mac OS X 10.4.11 Tiger�ˤǤ�������®���ȥ������ƥ��к��Τ����Squid���С���Proxy�Ȥ���Ƴ�����Ƥߤ褦�Ȼפäƿ�����äƤߤޤ���������ɺä��ޤ���(;_;)�����Τ��ȸ����ȡ�¿ʬSquid���С���Proxy�Ȥ���ư�������ϤǤ����Ȼפ��ΤǤ���������������ü����BLog�˵�������ࡢ���뤤�ϴ����ԤȤ��ƥ������뤳�Ȥ��Ǥ��ʤ��ʤäƤ��ޤä��ΤǤ���������������ˤ��뤳�Ȥ��Ǥ��������Squid�����̤Υե����Proxy�Ȥ���ư����Ƥ��ޤ�����ʬ�ε��ѥ�٥���㤵������ǧ����
���Ǥ���Squid�����줿�ΤǤ����顢��˺Ͽ�Ȥ���Squid��Ƴ����ˡ���Ƥ������Ȼפ��ޤ���
1. Squid������
 ��Squid��squid-cache.org��download�ڡ����������������ɤ��ޤ����������Ǥ�stable�ǿ��Ǥ�Ver.3.5.2�Τ褦�Ǥ����������ӥ�ɤ��褦�Ȥ��Ƥ����Ǥ������ɤ����SASL��Simple Authentication and Security Layer�ˤΥإå��ե����뤬ɬ�פ餷���ΤǤ�����MacOS X 10.4.11 Tiger��SASL���Τ����äƤ����ΤΥإå��ե���������äƤ��ʤ��褦�Ǥ����ȸ����櫓�ǡ��Ť�Version��Squid��Ȥ��ޤ����� ��Squid��squid-cache.org��download�ڡ����������������ɤ��ޤ����������Ǥ�stable�ǿ��Ǥ�Ver.3.5.2�Τ褦�Ǥ����������ӥ�ɤ��褦�Ȥ��Ƥ����Ǥ������ɤ����SASL��Simple Authentication and Security Layer�ˤΥإå��ե����뤬ɬ�פ餷���ΤǤ�����MacOS X 10.4.11 Tiger��SASL���Τ����äƤ����ΤΥإå��ե���������äƤ��ʤ��褦�Ǥ����ȸ����櫓�ǡ��Ť�Version��Squid��Ȥ��ޤ�����
��Ver.3.2�Ϥκǽ���squid-3.2.13-20130721-r11827�Ǥϥӥ�ɤϤǤ����ΤΡ�ư�����Ȱ۾ェλ���Ƥ��ޤ��ޤ�������Ver.3.1�Ϥκǽ���squid-3.1.23-20130721-r10487�Ǥϥӥ�ɡ�ư��Ȥ������ʤ������Ǥ������ȸ����櫓�ǡ������Ť��Ǥ�������squid-3.1.23-20130721-r10487��Ȥ����Ȥˤ��ޤ���
2. Squid Ver.3.1.23�Υӥ��
��squid-3.1.23-20130721-r10487.tar.bz2�����������ɤ����ʲ��μ��ǥӥ�ɡ����ȡ��뤷�ޤ�����
$ bzcat squid-3.1.23-20130721-r10487.tar.bz2 | tar xvf -
$ cd squid-3.1.23-20130721-r10487
$ ./configure --prefix=/usr/local/squid --with-large-files
$ make
$ sudo make install
|
���嵭�� Squid�� /usr/local/squid�۲��˥��ȡ��뤵��ޤ����ݥ���Ȥ�2GB��ۤ���ե�����ⰷ����褦 --with-large-files ����ꤷ�Ƥ������Ȥ����̤��ʡ�
3. squid�桼���������롼�פ��ɲ�
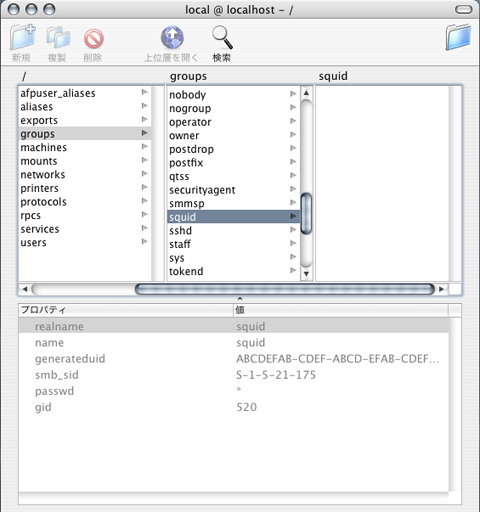
��Squid���ѤΥ桼�����ȥ��롼�פ��ɲä��ޤ���Linux���Ǥ�root�� useradd, groupadd���ޥ�ɤ�Ȥ��ޤ�����MacOS X 10.4.11 Tiger�Ǥ�"���ץꥱ�������/�桼�ƥ���ƥ�/NetInfo �ޥ͡�����"��Ȥ��ޤ���
1) squid���롼�פ��ɲ�
2) squid�桼�������ɲ�
4. ���ȡ��뤷�� /usr/local/squid ��owner, group��squid���ѹ�
$ cd /usr/local
$ sudo chown -R squid:squid ./squid
|
5. squid.conf�ե�������Խ�
��squid������ե�����"/usr/local/squid/squid.conf"��Ǥ�դΥ��ǥ������Խ����ޤ���
$ cd /usr/local/squid/etc
$ sudo cp -p squid.conf.default squid.conf
$ sudo vi squid.conf
|
���ե����Proxy�Ȥ��ưʲ��Τ褦�����ꤷ�ޤ������ѹ��ս���ֻ�����ʬ�Ǥ���
#
# Recommended minimum configuration:
#
acl manager proto cache_object
acl localhost src 127.0.0.1/32 ::1
acl to_localhost dst 127.0.0.0/8 0.0.0.0/32 ::1

# Example rule allowing access from your local networks.
# Adapt to list your (internal) IP networks from where browsing
# should be allowed
acl localnet src 10.0.0.0/8	# RFC1918 possible internal network
acl localnet src 172.16.0.0/12	# RFC1918 possible internal network
acl localnet src 192.168.0.0/16	# RFC1918 possible internal network
acl localnet src fc00::/7       # RFC 4193 local private network range
acl localnet src fe80::/10      # RFC 4291 link-local (directly plugged) machines

acl SSL_ports port 443
acl Safe_ports port 80		# http
acl Safe_ports port 21		# ftp
acl Safe_ports port 443		# https
acl Safe_ports port 70		# gopher
acl Safe_ports port 210		# wais
acl Safe_ports port 1025-65535	# unregistered ports
acl Safe_ports port 280		# http-mgmt
acl Safe_ports port 488		# gss-http
acl Safe_ports port 591		# filemaker
acl Safe_ports port 777		# multiling http
acl CONNECT method CONNECT

#
# Recommended minimum Access Permission configuration:
#
# Only allow cachemgr access from localhost
http_access allow manager localhost
http_access deny manager

# Deny requests to certain unsafe ports
http_access deny !Safe_ports

# Deny CONNECT to other than secure SSL ports
http_access deny CONNECT !SSL_ports

# We strongly recommend the following be uncommented to protect innocent
# web applications running on the proxy server who think the only
# one who can access services on "localhost" is a local user
#http_access deny to_localhost

#
# INSERT YOUR OWN RULE(S) HERE TO ALLOW ACCESS FROM YOUR CLIENTS
#

# Example rule allowing access from your local networks.
# Adapt localnet in the ACL section to list your (internal) IP networks
# from where browsing should be allowed
http_access allow localnet
http_access allow localhost

# And finally deny all other access to this proxy
http_access deny all

# Squid normally listens to port 3128
http_port 8080

cache_mem 16 MB

# Uncomment and adjust the following to add a disk cache directory.
cache_dir ufs /usr/local/squid/var/cache 200 32 256

# Leave coredumps in the first cache dir
coredump_dir /usr/local/squid/var/cache

# Add any of your own refresh_pattern entries above these.
refresh_pattern ^ftp:		1440	20%	10080
refresh_pattern ^gopher:	1440	0%	1440
refresh_pattern -i (/cgi-bin/|?) 0	0%	0
refresh_pattern .		0	20%	4320

cache_effective_user squid
cache_effective_group squid

#
# invisible setup
#
visible_hostname unknown
forwarded_for off
request_header_access From deny all
request_header_access Referer deny all
request_header_access User-Agent deny all
request_header_access X-Forwarded-For deny all
request_header_access Via deny all
request_header_access Cache-Control deny all
reply_header_access X-Forwarded-For deny all
reply_header_access Via deny all
reply_header_access Cache-Control deny all
|
6. squid.conf�ե�����Υ����å�
���Խ����� squid.conf �����꤬�ʤ��������å����ޤ���
$ sudo /usr/local/squid/sbin/squid -k parse
|
7. squid�Υ���å���ǥ��쥯�ȥ����
���Ϥ��Squid��¹Ԥ������ˡ�����ե������ cache_dir�ǻ��ꤷ������å���ǥ��쥯�ȥ�ʺ���ξ��� "/usr/local/squid/var/cache"�ˤ�������Ƥ����ޤ���
$ sudo /usr/local/squid/sbin/squid -z
|
������� cache_dir��������ѹ��������䡢����å�����������������ˤ�Ԥ��ޤ���
8. squid��ư������ץȤκ���
��squid���֡��Ȼ��˼�ư��ư����褦��/Library/LaunchDaemons�۲��˥�����ץȤ�������ޤ���
$ cd /Library/LaunchDaemons
$ vi org.squid.plist
|
��������ץȤϰʲ��Τ褦�ˤ��ޤ�����
<?xml version="1.0" encoding="UTF-8"?>
<!DOCTYPE plist PUBLIC "-//Apple Computer//DTD PLIST 1.0//EN" "http://www.apple.com/DTDs/PropertyList-1.0.dtd">
<plist version="1.0">
<dict>
	<key>Label</key>
	<string>org.squid</string>
	<key>OnDemand</key>
	<false/>
	<key>ProgramArguments</key>
	<array>
		<string>/usr/local/squid/sbin/squid</string>
		<string>-N</string>
		<string>-s</string>
		<string>-d 1</string>
		<string>-D</string>
	</array>
	<key>ServiceIPC</key>
	<false/>
</dict>
</plist>
|
�����դ������� -N���ץ�������ꤹ�뤳�ȡ�-N���ץ����ϥǡ����ץ������Ȥ��Ƶ�ư���ʤ��褦�ˤ��륪�ץ����Ǥ���
��OnDemand �� false �ξ�� LaunchDaemons �ϵ�ư���֤�ݻ�����褦��ư��ˤʤ�餷����squid���ǡ����Ȥ��ƾ��ƽ�λ����� LaunchDaemons���Ƥ� squid��ư�����ޤ������Τ��ᡢ-N���ץ�������ꤷ�ʤ��ä�����̵�¤�squid�ץ��������������Ƥ����Ȥ������ݤ������ơ����餤�ܤˤ��äƤ��ޤ��ޤ�����
9. squid��ư������
��launchctl���ޥ�ɤ���Ѥ���squid��ư�����ޤ���lauchctl �� load����ꤹ���硢�ե�����ϥե�ѥ��ǻ��ꤹ��ɬ�פ�����������ա��ޤ� -w ���ץ�������ꤷ�� load ���Ƥ���Τǡ��֡��Ȼ��˼�ư��ư����褦�ˤʤ�ޤ���
$ sudo launchctl load -w /Library/LaunchDaemons/org.squid.plist
|
����ư��������ǧ���Ƥߤޤ���
$ sudo launchctl list
��
org.squid
$ ps -aux | grep squid
squid 16949 0.0 0.8 60276 7968 ?? Ss Mon09PM 2:45.98 /usr/local/squid/sbin/squid -N -s -d 1 -D
squid 16950 0.0 0.1 27252 1284 ?? Ss Mon09PM 0:00.03 (unlinkd)
|
��̵���˵�ư���Ƥ���褦�Ǥ���
��squid.conf��������ѹ������ݤ� squid��Ƶ�ư����ˤϡ�
$ sudo launchctl stop org.squid
|
�Ȥ��ޤ���stop �ϥ���֤���ߤ�����ΤǤ�����OnDemand �� false �ʤΤ���߸夹���˵�ư�����Ĥޤ�Ƶ�ư�ˤʤ�ޤ��������� squid����ߤ��������Ȥ��ϡ�
$ sudo launchctl unload /Library/LaunchDaemons/org.squid.plist
|
�Ǥ���LaunchDaemons��launchctl�ˤλȤ����Ͼ�������������ߤ����ǡ����������Υ����Ȥͤˤ����Ƥ��������ޤ������������ʤɤ��ɤ��ޤȤޤäƤ��뤫�Ȼפ��ޤ���
|